Showing posts with label art. Show all posts

Tuesday, January 6, 2015

Renaissance Artist: Pieter Bruegel

So, next on our timeline....
is Pieter Bruegel or Brueghel.  
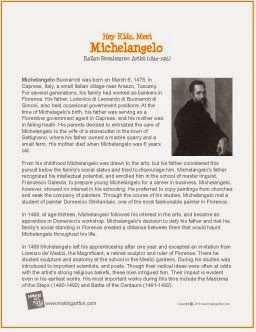
This is thought to be a self-portrait.  Kind of scary, if you ask us!  :-D

I never heard of the artist myself, except for having used the K12 art curriculum for 3 years.  :-)  They introduce these pieces of art.

pics from Wikipedia

A stop at the library helped branch out our mini study.

We focused on Getting to Know the World's Greatest Artists: Pieter Bruegel.  However, I always get multiple because my kids love to browse through nonfiction books.  They seldom check them out on their own though, nonfiction books that is.

I decided we were going to do a bit with the "Hunters in the Snow" again.  Here is an art documentary that we watched part of.  I think this is the first art critic/documentary the boys have ever watched.  :-)  I recommend the clip for older kids as the younger ones probably just wouldn't be all that interested.  :-D  It's good for my boys to see things from different perspectives and learn to think more like a "critic".  It's something I'd like them to do more with....look at a piece of art work and discuss it.

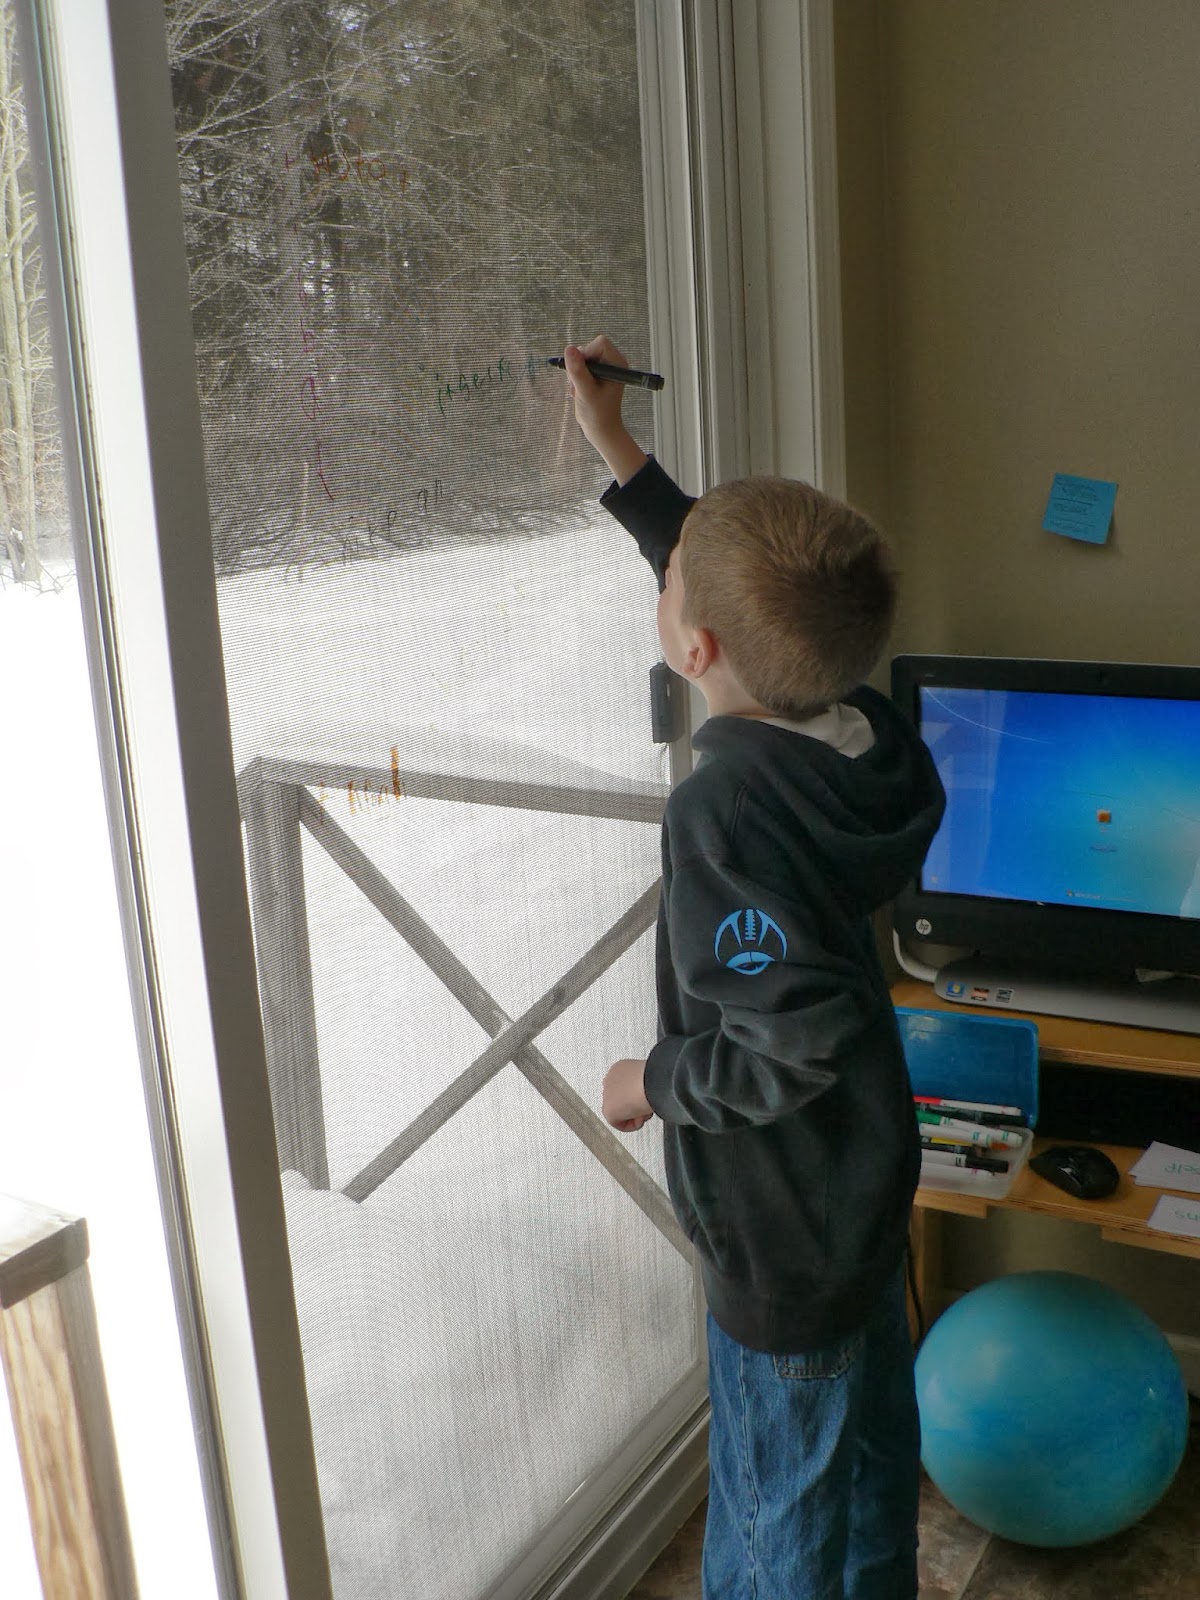
I found an art lesson shared online regarding atmospheric perspective and we did it.  You can find it at ArTree.
K-2 art lesson power point final products

grades 3-6 art lesson power point final products

We also watched a couple clips just before the power point lesson, refreshing their memory about the Renaissance (Pieter Bruegel was a Renaissance Artist)

The Renaissance:  Was it  a Thing?
FYI:  this is VERY fast paced.  For older kids for sure.  We had already went through the Renaissance time period with both the 4th and 6th grader so it was more of a review.

and in the middle of it.  :-)

Arc of the Arts: Atmospheric Perspective
Almost TOO slow, after the last clip.  LOL


We also spent some time  on "Netherlands Proverbs".
An interesting piece of art, to say the least.  Ha!
It's been said that Bruegel painted this to go along with his typical theme of "absurdity, wickedness and foolishness of humans".  :-D  Someone so kindly put together a table with the 112 proverbs and idioms that could be identified in the piece of art.  :-)  It's found here.  Quite interesting, to say the least.  :-)  Just a FYI:  it could be be considered crude in some regards.  I skipped over a few of them.  :-D Got us talking about what a proverb was....a short saying, typically well-known, that teaches a lesson.  This conversation also brought up the book in the bible Proverbs.  A little definition I liked: 

A proverb was used to make the reader listen, think about, remember, and then practice.

Of course, we ended with an acronym with his name.  :-D  This time, however, I wrote his name up on the board and we added characteristics as we went along.  This was suppose to  allow us to do an abbreviated study of Bruegel as we were having an abbreviated school week.  Didn't happen though.  We worked into the next week.  Oops!  :-D  Oh well, quality vs. quantity, a wise person told me, is the key!  

Thursday, December 25, 2014

Extension ideas for When the Root Children Wake Up by Audrey Wood

Read Write Think has a document with picture books that have well-developed settings.  You can find that document by clicking here.

I used this as a guideline for my kiddos, 4th and 6th grade, to go through and write about the characters, settings, and giving a short summary. Good practice for them and will help them in their journey in being stronger writers.

We read these books together as a group after the fact to discuss what they wrote down, as they need much practice in writing about books.  After reading, we also did an extension activity.  I found there were not a whole lot of ideas for these books online, like other more common books so I'll share the extension of this particular book with you.

When the Root Children Wake Up

This book was about the four seasons.  There is a character to represent each four seasons and children who had been asleep all winter wake up to enjoy spring, and then move through summer, fall and back to sleep.  

Before reading we brainstormed what we thought about when we see a color.  At first they started out with objects and then after a little talk about how certain seasons would fit into specific colors, they began to move into ideas/feelings colors may represent.  We talked about how illustrators often use a set of colors to portray an idea. 

 
At Web Design Depot we found this image that added to our conversation.

This image was stated to be at ZoeSoulSpa but is no longer available.  Moods/feelings are something we try to fit in as often as possible for the 4th grader, especially.

Another image that couldn't be found, supposedly at Educational Coloring Pages.  Kids liked this one because it was in a familiar format.


Google images are USUALLY a homeschooling mom's friend.  :-D  We can quickly BUT CAREFULLY search a topic and usually come up with a visual to help extend our conversations and thoughts.  My goal with discussing color is to bring their attention to how authors use color in their writing, especially to set a mood.  
An art project that we did to go along with this book was a Four Seasons Tree.  We got this idea from Arteascuola, a classroom blog. 
  

They used oil pastels and a toothpick to create the patterns, with exception of kinder who just used watercolor as this project was a bit above him.  We attempted doing watercolor-crayon resist but it really didn't suit for the paper we were using.  Regular construction paper, it probably would have worked.  Kiddos picked 2 or more colors to layer onto each section, per season, then used a toothpick (we did start with a paperclip but toothpick worked better) to create a pattern, if they wished.  

We "doodled" trees in our sketchbooks first.  This video helped us...
https://www.youtube.com/watch?v=1JmO6Cxr7ek

She went at a PERFECT speed for us.  :-)  Her calm voice helped diffuse any anxiety.  However, it starts out very light....the kids had a hard time seeing what she was doing at first, when we watched it as a group.  So, recommendation, watch it individually if you can and watch it completely through before starting over and sketching with her.


Monday, December 15, 2014

Famous Artists: Mini Study- Michelangelo

My kids LOVE timelines.  So, trying to work a few more into our day.  :-)  We also have a lot of fun doing projects/lessons together so here's a quick run over of what we started.

I came across this freebie at Practical Pages.  This is our guideline to some mini studies.  These are NOT taking a big part of our day.  We just touch on it a little bit most days of the week.

I'll use Michelangelo as our example of how I "touch" on these artists.


First, went to the library and picked up a few books.
Looked on internet for a video like we watched for Leonardo da Vinci...kids loved it! But, nope, couldn't find one I liked.  Oh, well. Back to the books.

Day 1) biography and search a word puzzle

These are challenging search a word puzzles because...there are NO words to find.  :-D  What  I mean, is that the children having to find "key words" from the biography and then look for them.  The first one we did, Leonardo da Vinci...was difficult.  Michelangelo...they did MUCH better.  So, 3rd grade and up, probably, younger if you are going to assist.
Day 2) Look through and discuss the artist's famous pieces of work.
We used books, internet art galleries and such.
Start project.

In this case we started the hands of Creation of Adam.
Yes, I had one kiddo that started balking at the nakedness in most of Michelangelo's works.  It surprised me a bit because really, we are pretty "matter of fact" about that type of thing.   Just the age, probably.  Anyway, we focused on the hands, fingers almost touching.
 -------------------------------------------------------------------------------
 I placed a large bulletin board across two chairs so they could lay upside down to paint.  Michelangelo spent 4 years standing on a scaffold looking up to paint the Sistine Chapel's ceiling.  I'd never get C. to do that so laying down was the next best.  :-D  With A.  I probably could have given him a ladder and attached his work to the ceiling.  ;-)  Anyway, C. lasted about 5 minutes and then asked if he could flip the board over.  Hey, he made it 5 minutes...that's better then not trying!

Day 3) Finish up the day before's project.
Below, C. is mixing up colors for his background.  It's about the only part of art he really likes...mixing his own colors.  :-D  For skin color I use the little saying, 
"Red, yellow, brown-white, that's how you mix skin tones right."  
Any combination of those colors will make a skin tone.  I always suggest starting with lightest colors first.
 

End Products:
4th grader who does not like art.  :-D  Didn't make enough of one color paint and then couldn't make the same color but it worked out nicely.  A year or two ago he would have given up or even ripped up his work.  He has made a lot of progress.  He was "bummed" but accepted it, even saying that it kind of looked like it was bringing focus to one of the hands.

6th grader's, more detail on hands.  He also painted the background laying on the ground like his hands.  He really enjoyed that.  :-)

Day 4) Project 2-Soap Sculptures
This was quite enjoyable, especially for 6th grader.  
Ivory soap is quite easy to work with.  Most of the time they used just the steak knife.  We went to the dollar store first and found bars for $1.  Went to Meijer and they had a 3pk for $1.29.  So in this case, check Meijer, or a similar store first.  I'm actually going to go out and get the large pack they had at Meijer to keep available in case the kids want to explore with it again.  :-)  There are little youtube clips about how to do it, but the jist of is to use the point of a knife to draw a simple shape and then cut/shave off until that shape is all that is left.  Use the flat side of knife to curve and smooth.

Day 5)  Artist's Name Acronym 
We actually did acronyms in writing and introduced it as a way to give information.  

(I've been taking pics with phone and every time I crop, I can't get the cropped image to upload...some day I'll get it figured out!)

This is the one from Leonardo da Vinci, from last week.  :-)  They wanted to do the same "picture as background" but we had to go legal sized paper for Michelangelo.  :-)
 

This has been awesome for the children...a way to learn about character traits but also organize information in an appealing way.  They love that we work together to make a final one in print shop, with pictures.  Soon, they'll be able to do that on their own!

Here's a site I found interesting.  POSITIVE adjectives in alphabetical order.  This is a great vocab builder for my kiddos!  
http://systemagicmotives.com/positiveadjectiveglossary.htm

I see there are others, I'll have to check them out.  :-)  I like the idea of keeping it "positive" though!


Saturday, February 8, 2014

February 3-7, 2014

Miss E. Snapshots
Helping hands!  Typically this is at her free time and so this means even more to me because she (and the others also) are wanting to interact with baby when they could be playing instead.  Such skills and empathy is being learned!  One benefit of schooling at home, for sure!

Preschool
www.makinglearningfun.com for pattern block letters.

These were "clip a rhyme" strips but I provided a transparent chip.  He arranged the strips in front of him, placed a chip on the first picture, then slid the chip across the strip, saying the picture words until he found one that rhymed with the first picture.

He added buttons and wrote the addition problem on the bottom.  I love that now he is talking about adding in his play.  Yesterday, on the way home from the store, he was eating chocolate covered raisins and told me...Mom, 1+2+2=5!  And that same night, as he was feeding baby E. he was doing more random adding. When it starts coming out in their "play", you know they "got it!"

 He created a picture and letters with colored craft sticks and then drew the representation in his sketchbook using the corresponding colored pencils.  

Watercolors and Snow
I saw on Pinterest that someone used watercolors and snow.  I have always used food colored water and eye droppers....so wanted to give this a try.  Can't say it makes the boldest colors but he did enjoy the "science" behind what happens to the snow on the paint brush when he dipped it in the water.  Ha!

Every Friday I try to give him a "whole alphabet" writing task.  It helps me see where he is at with correct letter formation.

Language Arts
Language Arts1 is quite a bit different than last year . It covers the same things, of course, but much more visually appealing and they have a journal this year!  Love it!

Spelling
Had quite a bit of writing to do this day so he just used magnetic letters to build his words and used the Say, Spell, Say method.  

 Spelling Word Train
 Marks on the window is often a kid favorite.  Actually, I've been known to do mini lessons at the door if they are sitting at that computer right there.  Very convenient!

Ha! This makes me smile and I don't even really remember what we were all laughing about.
 
Making Sentences Bigger/Combining Sentences
 Anyway....we made a mistake and did the wrong writing sheet.  I remember thinking...what?!  They expect her to know this already?  Obviously, she didn't.  So after I pulled out the index cards and etc and did a more hands-on approach to using conjunctions (which we have discussed regularly with our whole group grammar talks and they love the SchoolHouse Rock:  Conjunction Junction) and combining sentences I see the sheet were were SUPPOSE to be doing first.  Ah well...it's still a concept that takes practice and we'll be doing just that.  I did want to say though...actually being able to manipulative those words and punctuation marks....made a world of difference!

Math3:  Elapsed Time
This is relative easy for C.  Actually, most math is.  However, he loved using "his" clock to work his problems....made it a bit more enjoyable.  Same for using his calendar for elapsed time on a calendar.

Misc. Pictures
Happy Birthday to my eldest boy...11 years old already!  A quick celebration because we'll be celebrating with the rest of the family on the weekend.  :-)


We had left over cupcakes that the children could decorate, if they wished, for snack.  :-)  Below, A. is working with his brand new microscope and sharing the experience with the 2nd grader!
I commented that I had learned that Lincoln was actually sitting in the memorial on the back of the penny.  Then a couple of comments were made to make me feel like I should have known that already.  Well, I didn't and I wonder how many more people do not know it.  Yes, in the actual Memorial, Lincoln is sitting there...hard to miss....but in the Memorial on the back of the penny...did you know?  It's very hard to see if you aren't looking for it..but we did find it with the microscope!  

 She finished her sewing project!  She as very proud of her stuffed kitty cat and I was quite pleased with her willingness to work a little here and there and complete the project.

My 2nd oldest kiddo...this is a typical sight.

Art 
 Art1:  Vincent VanGogh
We decided to do a different approach to the art project.  :-)  "Fingerpainting".  :-D


 Art2:  Cityscape
 These are awful snapshots of their end products.  I hadn't flattened them and water color on this particular brand of construction paper always dries wrinkled.  You'll have to take my word for it that, in person, they are quite lovely!  :-)
1st grader and preschooler, pretty similar to my demonstration...the 1st grader did a reflection.
2nd grader and 5th grader above and 3rd grader below.  Hard to see, but they all did reflections.  Older two were very specific in stating they were planning on creating abstract art.  :-)
 We initially were attempting to do the Usborne approach to using oil pastels and then pressing the print on the other half...didn't work, no matter how hard we pressed those oil pastels.

Science
Science3:  A Science Class Connect w/ experiment of which material conducts heat the best.  

Science5:  A bombed science experiment......but he had fun distracting us with the balloons. 
It's always good for an experiment not to work every once in awhile...it helps them think critically about why it didn't and they'll learn from that the next time.  

Science2:  Three Types of Rocks
Sedimentary- L. and C. layered sediment and added pressure.
It turned into a yummy treat on yogurt and pudding.
Our sediment was 
crushed pb cereal, coconut, hammered chocolate chips, white chocolate chips
T. and K. created metamorphic rocks by layering various types of chocolate chips, graham crackers and marshmallows.  We baked it (added heat) and then added pressure.
Definitely a very yummy slop!
 A. created igneous rock- white chocolate chips and red food coloring.  He then created rocks on wax paper that cooled very quickly and they also enjoyed snacking on.  Talk about a sugar overload day!

We explored, sorted, classified rocks.  Magnify glasses are what we usually use but this year we had the microscope for the first time!  FUN STUFF!


Science 2:  Fossils!
 THEY LOVED THIS!
 T. decided he was going to explore more with play dough during his work time!
I had gone looking for a dough recipe for this and lo and behold, found someone else who had done the same project.  Ha!  
The Imagination Tree is where I got the salt dough recipe from and she also used shells.
For the 5 kids I mixed
2 C. flour
 2 C. salt
1 C. water
I mixed it all together at once, so it as a bit "salty" as we were working with it.  She suggests mixing the flour and salt together first then adding water.  Then kneed until no longer sticky.  This amount allowed them to create 4 different fossils.  We baked at 200* for about 2 or so hours, then flipped them over and baked another hour or so.

Science2:  Earth's Layers

 Rolling out the dough and creating the layers by folding them up over top of the original ball-inner core.  
 Getting a little help from the fifth grader who absolutely loved this idea of a project.  Unfortunately, this project takes a hoard of play doh so he just helped the 2nd grader instead of making his own.  (We did use play doh as we really didn't have enough colors of clay.  Really, it was much easier for L. to manipulate than the clay would have been and it turned out just fine!
Science1:  Animals

Aw!  Didn't she do a great job creating a tree frog?  It really is just a paper craft...good scissor skill practice.  Wish we had time to do more of it.  K. does the most because she usually has more time than the other kiddos.  You can find the link to this pattern at Learn Create Love.

Science3:  Human Body

C. went through his human body unit on his own and now we are going to spend a few weeks doing group lessons/activities with all the systems since every grade level does SOMETHING about these wonderful bodies of ours!  :-)