My kids LOVE timelines. So, trying to work a few more into our day. :-) We also have a lot of fun doing projects/lessons together so here's a quick run over of what we started.
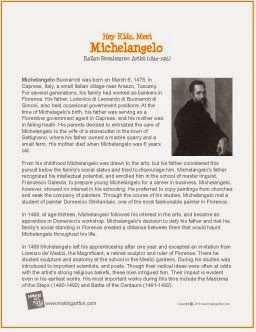
I came across this freebie at Practical Pages. This is our guideline to some mini studies. These are NOT taking a big part of our day. We just touch on it a little bit most days of the week.
I'll use Michelangelo as our example of how I "touch" on these artists.
First, went to the library and picked up a few books.
Looked on internet for a video like we watched for Leonardo da Vinci...kids loved it! But, nope, couldn't find one I liked. Oh, well. Back to the books.
Day 1) biography and search a word puzzle
These are challenging search a word puzzles because...there are NO words to find. :-D What I mean, is that the children having to find "key words" from the biography and then look for them. The first one we did, Leonardo da Vinci...was difficult. Michelangelo...they did MUCH better. So, 3rd grade and up, probably, younger if you are going to assist.
Day 2) Look through and discuss the artist's famous pieces of work.
We used books, internet art galleries and such.
Start project.
In this case we started the hands of Creation of Adam.
Yes, I had one kiddo that started balking at the nakedness in most of Michelangelo's works. It surprised me a bit because really, we are pretty "matter of fact" about that type of thing. Just the age, probably. Anyway, we focused on the hands, fingers almost touching.
-------------------------------------------------------------------------------
I placed a large bulletin board across two chairs so they could lay upside down to paint. Michelangelo spent 4 years standing on a scaffold looking up to paint the Sistine Chapel's ceiling. I'd never get C. to do that so laying down was the next best. :-D With A. I probably could have given him a ladder and attached his work to the ceiling. ;-) Anyway, C. lasted about 5 minutes and then asked if he could flip the board over. Hey, he made it 5 minutes...that's better then not trying!
Day 3) Finish up the day before's project.
Below, C. is mixing up colors for his background. It's about the only part of art he really likes...mixing his own colors. :-D For skin color I use the little saying,
"Red, yellow, brown-white, that's how you mix skin
tones right."
Any combination of those colors will make a skin tone. I always suggest starting with lightest colors first.
End Products:
4th grader who does not like art. :-D Didn't make enough of one color paint and then couldn't make the same color but it worked out nicely. A year or two ago he would have given up or even ripped up his work. He has made a lot of progress. He was "bummed" but accepted it, even saying that it kind of looked like it was bringing focus to one of the hands.
6th grader's, more detail on hands. He also painted the background laying on the ground like his hands. He really enjoyed that. :-)
Day 4) Project 2-Soap Sculptures
This was quite enjoyable, especially for 6th grader.
Ivory soap is quite easy to work with. Most of the time they used just the steak knife. We went to the dollar store first and found bars for $1. Went to Meijer and they had a 3pk for $1.29. So in this case, check Meijer, or a similar store first. I'm actually going to go out and get the large pack they had at Meijer to keep available in case the kids want to explore with it again. :-) There are little youtube clips about how to do it, but the jist of is to use the point of a knife to draw a simple shape and then cut/shave off until that shape is all that is left. Use the flat side of knife to curve and smooth.
Day 5) Artist's Name Acronym
We actually did acronyms in writing and introduced it as a way to give information.
(I've been taking pics with phone and every time I crop, I can't get the cropped image to upload...some day I'll get it figured out!)
This is the one from Leonardo da Vinci, from last week. :-) They wanted to do the same "picture as background" but we had to go legal sized paper for Michelangelo. :-)
This has been awesome for the children...a way to learn about character traits but also organize information in an appealing way. They love that we work together to make a final one in print shop, with pictures. Soon, they'll be able to do that on their own!
Here's a site I found interesting. POSITIVE adjectives in alphabetical order. This is a great vocab builder for my kiddos!
http://systemagicmotives.com/positiveadjectiveglossary.htm
I see there are others, I'll have to check them out. :-) I like the idea of keeping it "positive" though!


.jpg)


No comments:
Post a Comment